How to set up a Git Repository via JupyterLab-Gallery
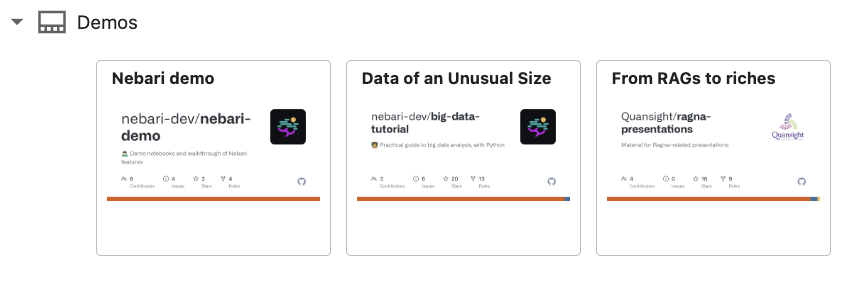
JupyterLab-Gallery is a JupyterLab plugin that allows users to share a Git Repository. JupyterLab users are presented with a tile in the JupyterLab launch screen. Users can choose to download the Exhibit.
By default, if no JupyterLab-Gallery items are added to the config, users will not see this section in the JupyterLab Launcher.
This feature was added to Nebari in the 2024.6.1 release.
Configure JupyterLb-Gallery
In Nebari, the JupyterLab-Gallery configuration is set in the Nebari configuration, nebari-config.yaml.
The configuration is set under the jupyterlab section under the subsection gallery_settings.
Users may set a title for the Gallery section of the Launcher screen and a destination (i.e. folder)
for the location of the cloned repos.
Several repositories can be configured to display as individual gallery tiles. Under the exhibits
section, each repository must have a title and a git location. There are also several other
optional config options.
The configuration is set at two different levels. Top level gallery settings define the title of the Gallery section and the location in which the repositories are downloaded. The repository level settings are defined for each repository. The settings in each section are described below.
Top Level Gallery Settings
| Section | Description |
|---|---|
| title | Title on the gallery tile |
| destination | Location on disk where the repo will be downloaded |
Repository Level Settings
| Section | Description |
|---|---|
| title | Title on the gallery tile |
| git | URL of the git repository |
| homepage | (Optional) |
| description | Description of the repository to appear on the gallery tile (Optional) |
| icon | URL or base64 encoded image to use an icon to appear on the gallery tile (Optional) |
| account | (Optional) |
| token | Private Access Token to enable access to private repositories (Optional) |
Sample configuration
Below is an example of the Gallery settings from the nebari-config.yaml. Note that <encoding>
and <PAT> should be replaced with the actual encoding and Private Access Token, respectively.
jupyterlab:
  gallery_settings:
    title: Demos
    destination: demos
    exhibits:
    - title: Data of an Unusual Size
      git: https://github.com/nebari-dev/big-data-tutorial.git
      description: Big data tutorial focusing on Dask usage in Nebari
      icon: "data:image/png;base64,<encoding>"
      homepage: https://github.com/nebari-dev/big-data-tutorial/
    - title: From RAGs to riches
      git: https://github.com/Quansight/ragna-presentations.git
      homepage: https://github.com/Quansight/ragna-presentations/
    - title: Private Examples
      description: Internal company examples
      icon: "data:image/png;base64,<encoding>"
      git: https://gitlab....net/companyxyz/examples.git
      account: examples
      token: "<PAT>"
Using JupyterLab-Gallery
Once the repositories are configured in the Nebari config and redeployed, all users will have a section on their JupyterLab Launcher screen for the Gallery.
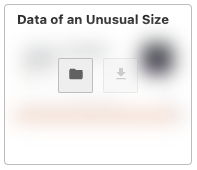
Each tile points to a different gallery entry in the configuration. The Gallery repositories will not be downloaded until users trigger the download for each gallery item. To do so, users will hover over the tile and click the download button.
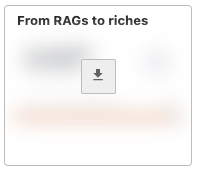
The repository will download to the location specified in the config (in each user's private space). After the download is complete, hover on the gallery tile present the users with two new options - the folder icon allows them to jump to the location in the JupyterLab file browser, and the download button allows them to fetch an updated copy of the repo (if available).
Conclusion
For more information on the JupyterLab-Gallery project, visit the JupyterLab-Gallery codebase repo.
For more information about custom JupyterLab Overrides in the Nebari config, visit the Custom Overrides Configurations documentation.